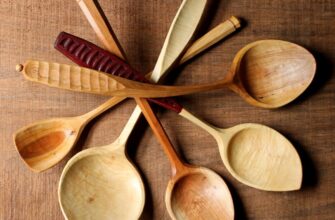
Relief carving is one of the ancient ways of decorating objects: dishes, furniture, decorative elements, and other things. Carved things still enjoy universal admiration and popularity. Having mastered all the subtleties of craftsmanship, the carver can secure a good income.
But how to master this difficult craft? What are the tips for relief carving for beginners? You will find all this in this article.
- What is a relief carving?
- High-relief and low-relief carving
- High-relief carving
- Low-relief carving
- Types of relief carving
- Flat notched (recessed)
- Contour relief carving
- Geometric relief carving
- Flat relief carvings
- Relief carving with matched background
- Relief carving with pillow background
- Relief wood carving
- Bas-relief carving
- High relief carvings
- Welt thread
- Sculptural (volumetric) carving
- House (ship) carving
- How to choose material for work
- Pine
- Larch
- Tiss
- Juniper
- Cedar
- Oak
- Apple tree
- Hazel
- Aspen
- Rowan
- Alder
- Relief carving techniques for beginners
- Step 1: Prepare relief carving tools
- Step 2: Search and prepare wood carving
- Step 3: Find a template to cut out
- Step 4: Transfer the pattern onto the wood
- Step 5: Remove excess material around the wood panel
- Step 6: Add depth to the wood panel
- Step 7: Carve in shadows and details
- Step 8: Smoothen wood carving
- Step 9: Finish your wood carving
- FAQs
- What kind of wood is best for relief carving?
- How thick should wood be for relief carving?
- What are the 4 types of relief sculpture?
- Conclusion
What is a relief carving?
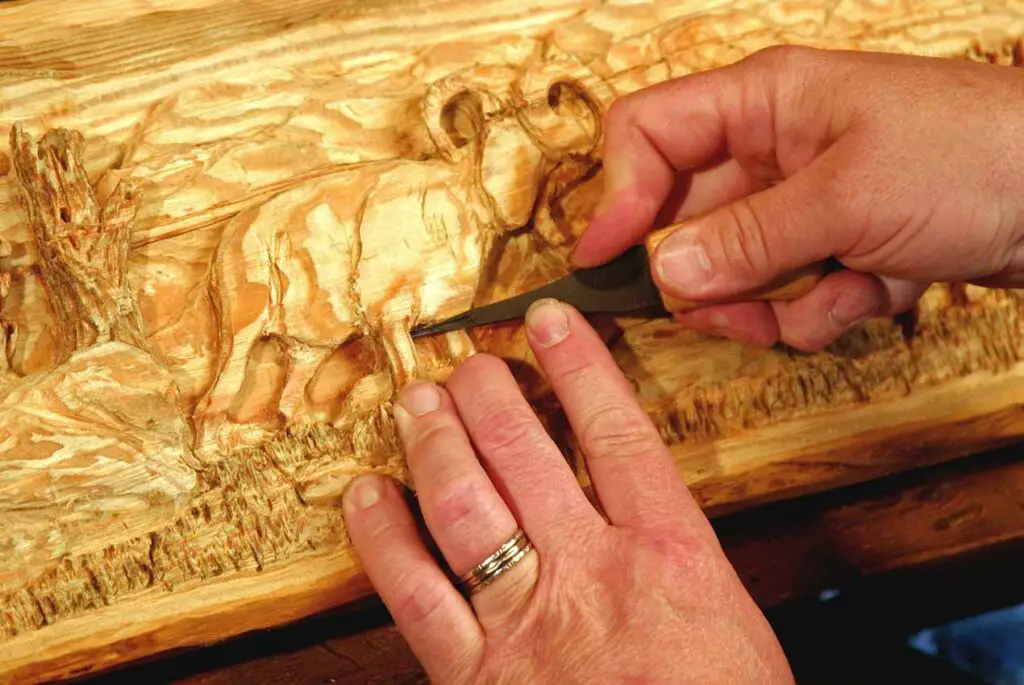
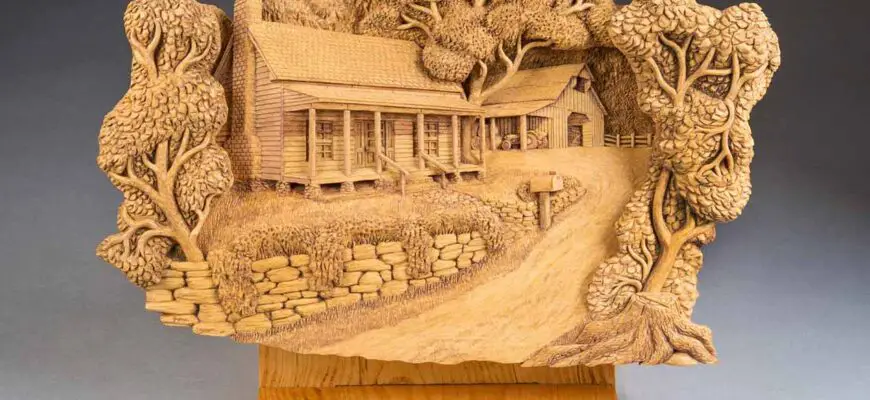
Relief carving is the creation of three-dimensional images on a flat wooden panel. According to the old definition, “relief” – translated into “visible” – means that a work of art is prominent and emphasized.
When you cut out the relief, you present a clear image of the image that stands out from the background. You will need to use various woodcarving tools to create a breathtaking illusion.
With the right wood carving tools, you can practice basic relief carving techniques.
High-relief and low-relief carving
High and low relief are two forms/styles of relief carving that are most popular with wood carvers. Now let’s see how these two styles of relief carving differ from each other.
High-relief carving
For proper high-relief carving, your wood needs to be at least twice as thick as the design you want to create because otherwise warping of the wood will damage the entire panel.
High-relief carving gives the impression of great depth, usually much greater than low-relief carving.
High-relief carving is similar to deep relief, with deep-relief carving the background of the surface remains intact.
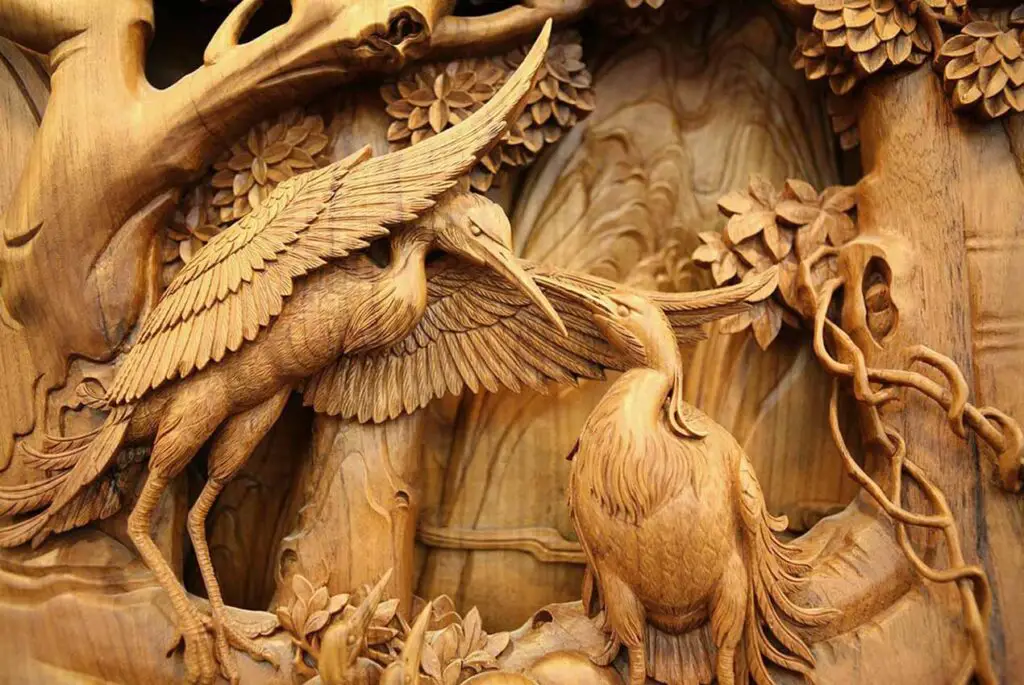
Deep relief carving is the most complex and usually the most difficult in both detail and craftsmanship.
Low-relief carving
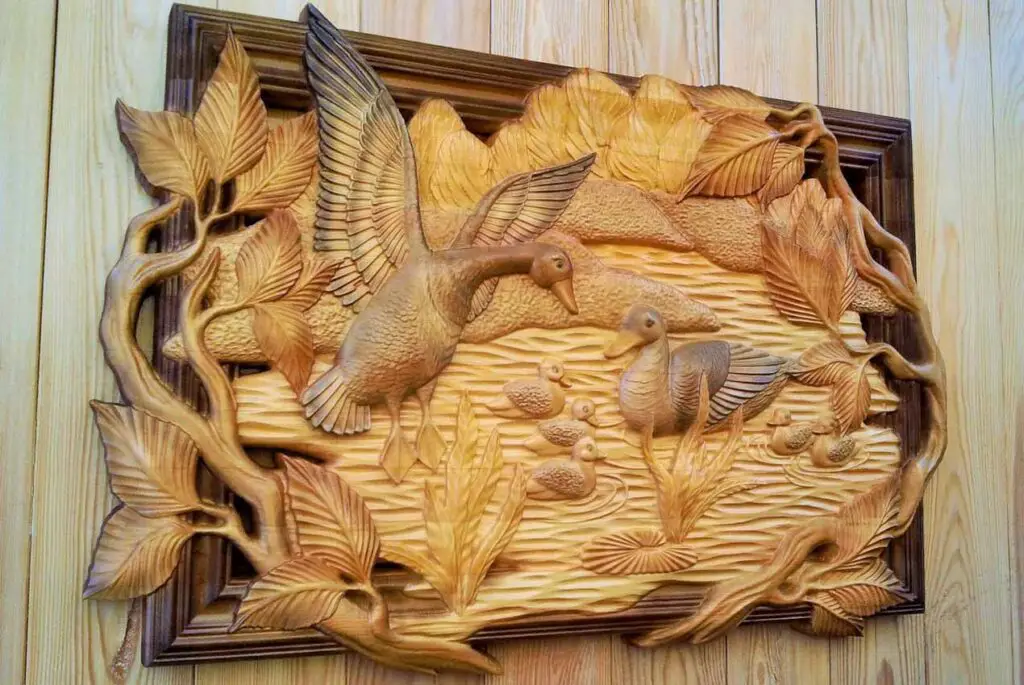
Low-relief carving, also popularly referred to as bas-relief (basso-relievo), is a form of relief in which carved figures protrude only slightly from a wooden background or surface. This means that low-relief carvings give the impression of little depth, although the depth is not necessarily shallow.

Types of relief carving
With the development of this craft, various types of relief carving have emerged, among which are such:
- flat notched (recessed)
- contour thread
- geometric
- flat-relief
- carving with matched background
- carving with pillow background
- embossed slotted (openwork)
- sculptural (volumetric)
- brownie (ship)
Flat notched (recessed)
As follows from the name of the flat carving, its background is a flat surface (both the workpiece and the object being decorated), and the relief wood carving patterns are made up of recesses (cavities) of various shapes.
Flat serrated threads are subdivided into contour and geometric.
Contour relief carving
After the basic course has been completed, you can proceed to perform various types of carving. You should start with simpler ones, and gradually move on to more complex ones. The contour carving technique is relatively simple.
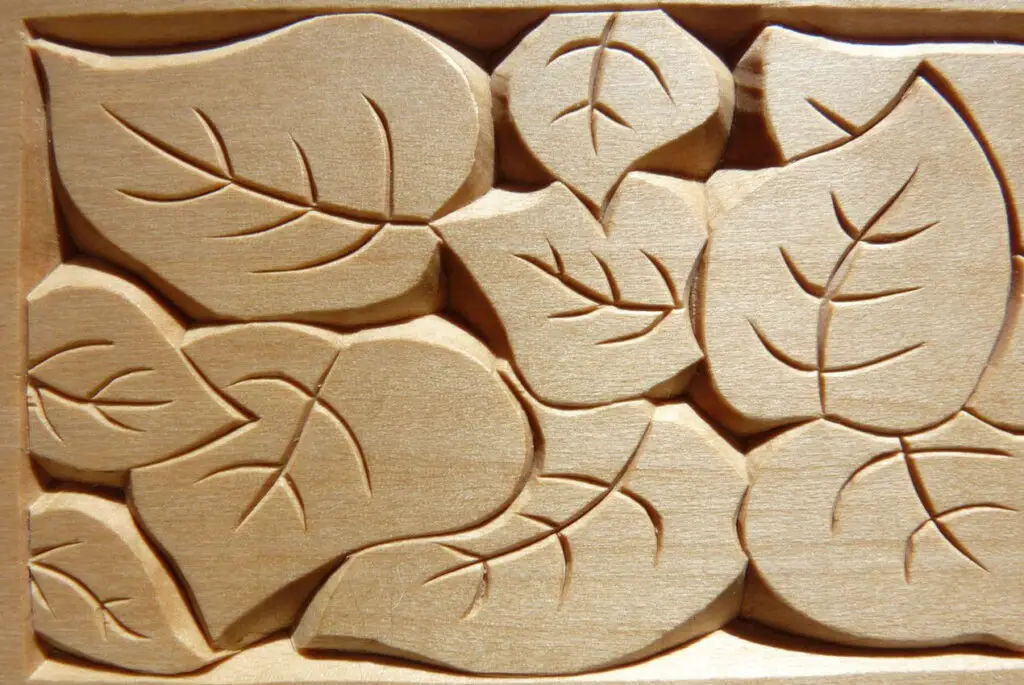
It is a linear, slightly in-depth relief wood carving pattern formed by straight, winding, or broken lines that fold into dihedral or semicircular recesses and outline the contours of the image.
Most often these are images of animals, birds, and floral motifs (flowers, leaves). The image, made in the technique of contour carving, resembles an engraving, since the lines are rigid, the play of chiaroscuro is practically absent. Contour carving is often combined with painting.
Geometric relief carving
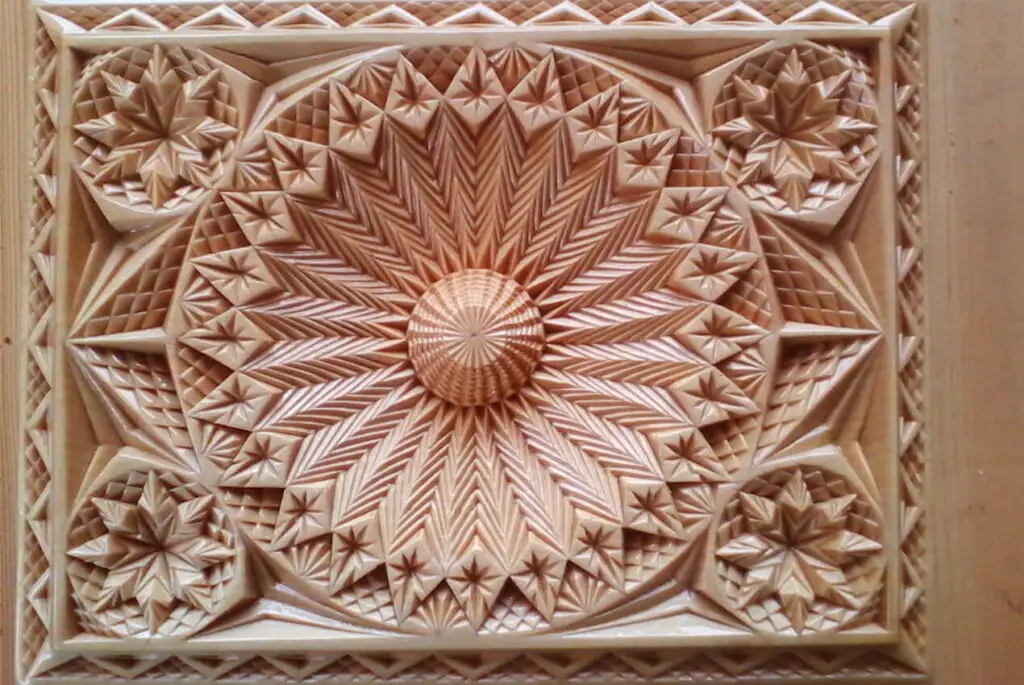
The most popular type of carving is geometric, which is explained by the relative simplicity of its elements, which, however, does not at all reduce its complex decorative carving.
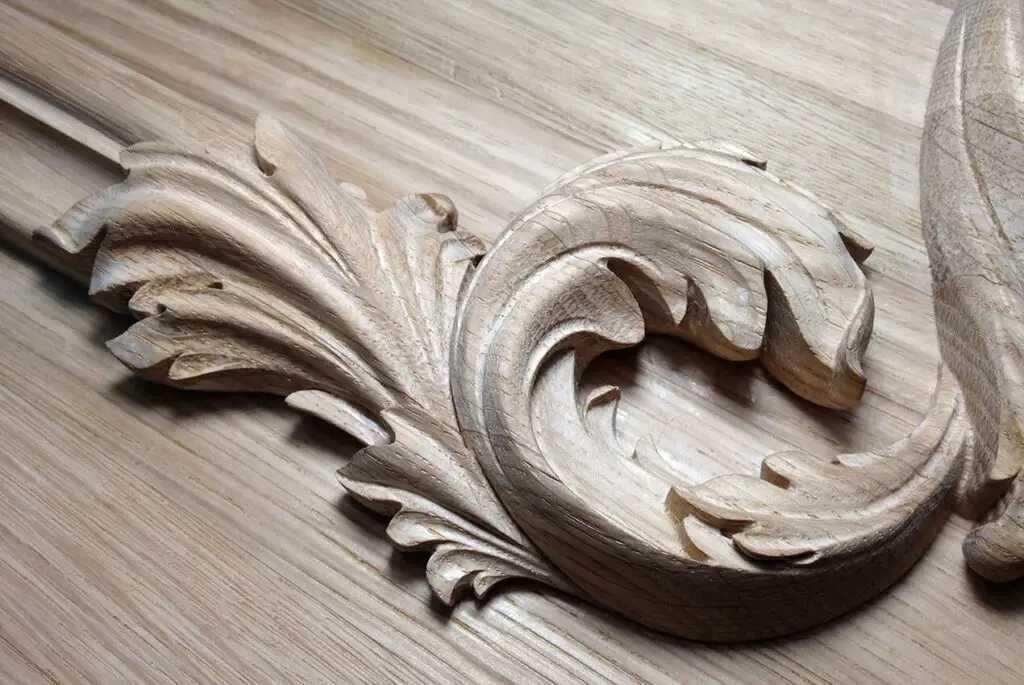
Despite their simplicity, geometric ornaments are distinguished by an unusual play of chiaroscuro that adorns the product, and give great scope to the master’s imagination, allowing to develop and embody various relief wood carving patterns, ornaments, and compositions. In addition, it is enough for him to have a modest set of relief carving tools.
Flat relief carvings
When performing a flat-relief carving, the image is located in one plane, while the relief, diverse in relief carving pattern and composition, is revealed peculiarly. To do this, the background surrounding the element or ornament is selected or deepened. As a result, the relief appears more convex and distinct.
Relief carving with matched background
The execution of this type of flat-relief carving does not differ in technique from that described above, except for background processing.
The nature of the background processing (sampling to the required width and depth) depends on the characteristics of the picture and the desire to give it expressiveness and a special decorative effect. The background can be covered with embossing or various profile cuts, which will also help create a special visual effect.
Relief carving with pillow background
A characteristic feature of such a wood relief carving is that the background is never flat. The type of carving got its name because the relief carving pattern is steeply ovalized from the side of the contour, which, as a result, becomes similar in shape to a small pillow. Carving is done while standing.
Relief wood carving
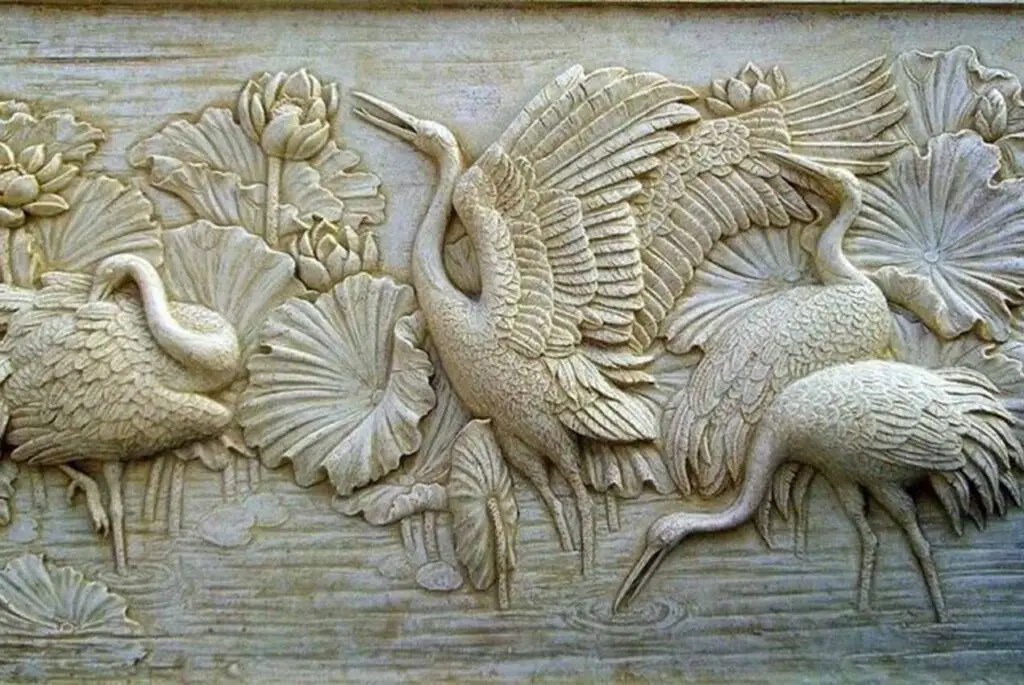
Of the presented varieties, relief carving is the most expressive, therefore, in former times, wall panels, furniture, doors, and ceilings were covered with it. It is still relevant when decorating the interior.
There are 2 types of relief carving – bas-relief and high relief.
Bas-relief carving
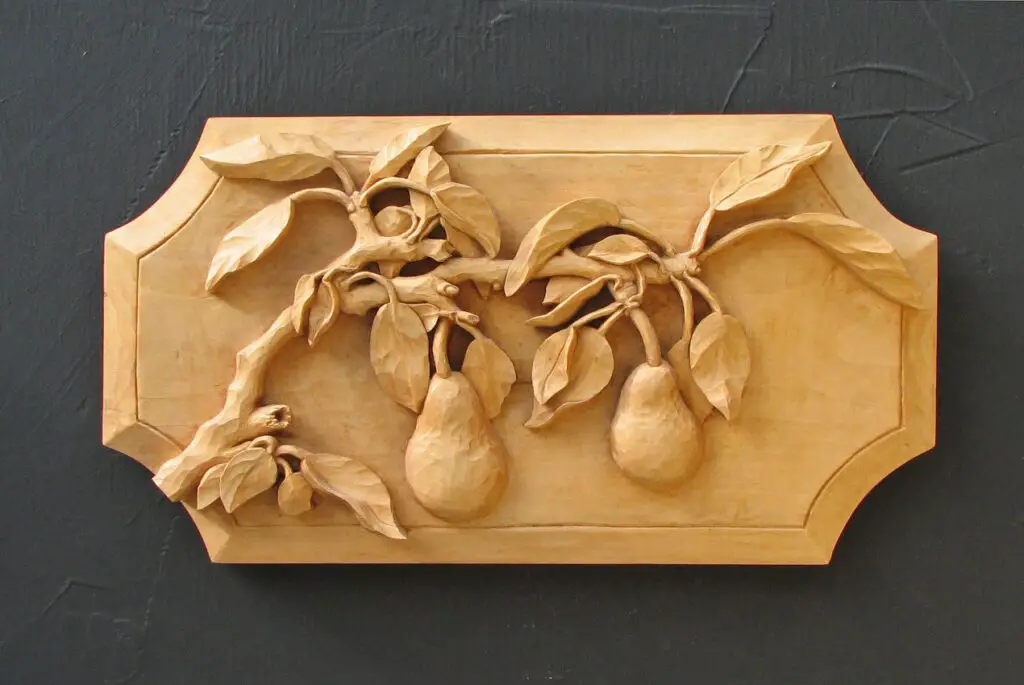
Low-relief wood carving, also popularly called bas-relief. Bas-relief carving is a type of relief sculpture, which is characterized by such a feature: the convex part of the image rises above the plane by no more than half of its volume.
Bas-relief – the figure rises above the background by less than 1/2 of its height. The bas-relief can be found not only in architecture but also as decor for monuments, coins, medals, gems, etc.
High relief carvings
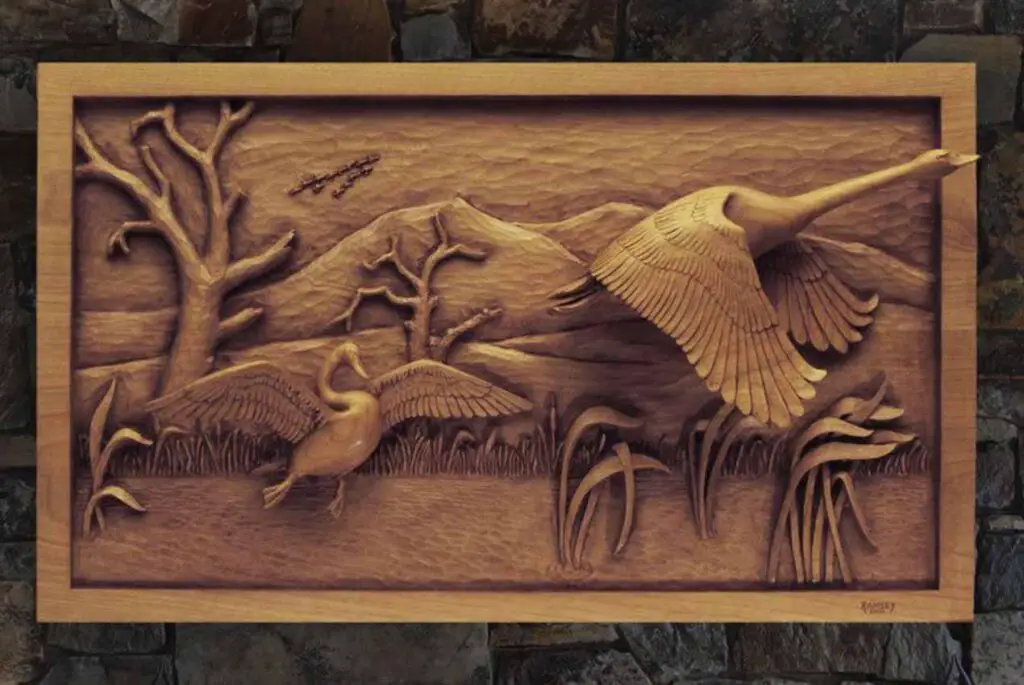
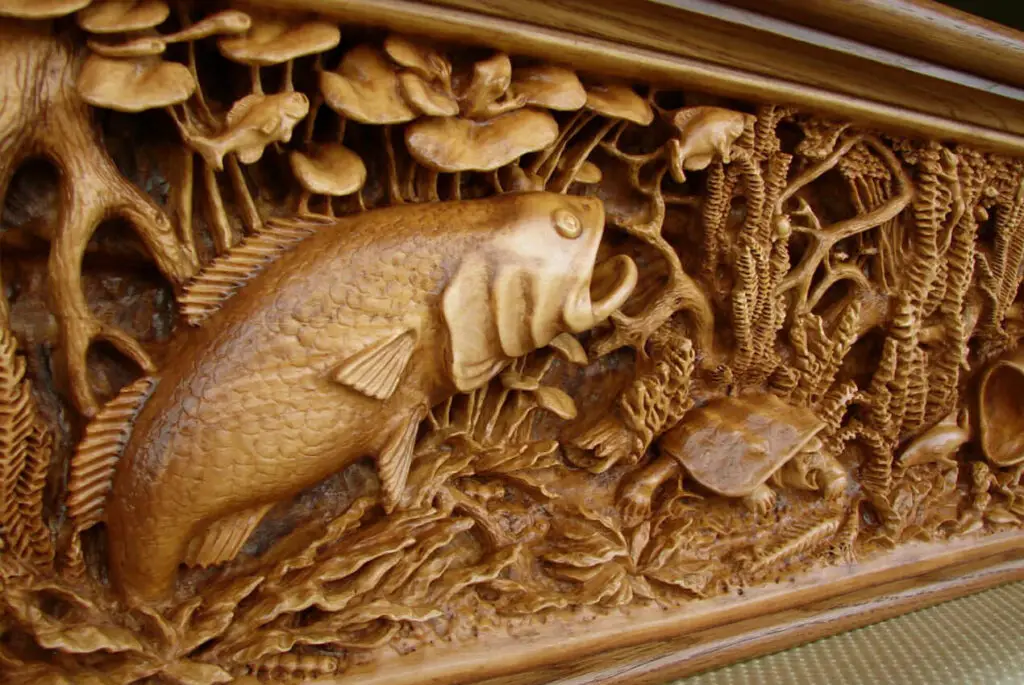
High relief – protrudes above the background by more than 1/2 of the height and looks like a sculpture, not completely separated from the background. High-relief carving is used mainly in architecture.
Welt thread
The name of this type of relief carving means that with this method of processing wood, the background is removed. Therefore, such a thread is otherwise called sawn or through.
Slotted carving techniques are quite simple, so since ancient times, it has been used to decorate houses (cornices, platbands, etc.). It can be used as an independent type and in combination with geometric and embossed relief carvings.
In the latter case, this work seems to be more laborious, but very effective. Welt carving, combined with geometric and embossed, is called through openwork because it resembles lace.
Sculptural (volumetric) carving
Sculptural carving is the most ancient and dates back to the time when a person carved figures of pagan gods from wood, whom he worshiped, and from whom he sought help and protection.
Sculptural carving has found wide application in interior decoration: the legs of chairs, sofas in the form of animal or bird paws; armrests depicting fantastic creatures, etc.
You can start it only after you have mastered the techniques of geometric, contour, and relief carving.
House (ship) carving
The name of this type of carving speaks for itself: house carving is intended for the exterior decoration of a dwelling and its interior decoration.
By the nature and technique of execution, house carving can be embossed, slotted, and volumetric.
How to choose material for work
Pine
It has a straight-grained wood with yellowness, powerful with an average degree of drying. It is easy to work with if the wood is not very resinous, it is excellent in gluing, but not particularly convenient in finishing operations and painting. Almost unsuitable for fine carving. But it is also used for carved decoration of buildings.
Larch
The wood is of the highest quality. Heavy and strong, not the easiest to work with, but very durable. It won’t rot in the damp. But more often it is taken for the construction of houses and the manufacture of parquet.
Tiss
Sound breed, its inside is dense and heavy, practically does not rot. A good choice for carpentry and turning needs. It is classified as a “red” breed.
Juniper
And this is a very interesting breed for carvers. A heavy and hard tree dries out a little, it is not afraid of decay, and it keeps a pleasant aroma for a long time. It behaves well when cutting, is good at touching up, and is obedient in polishing. Dried juniper is considered an excellent basis for carpentry. Wood is a suitable choice for fine relief carving as well as bulk carving.
Cedar
Its structure is close to pine wood; therefore it is in demand in carving. So, a tree looks favorably in polished smooth products, in various kinds of crafts, and decorated with contour carvings.

Oak
Dense wood with a graceful structure, with medium drying and low cracking. It is necessary to process oak with considerable force and with the help of high-quality, well-sharpened tools. Its wood is often used for carving and turning, for mosaic operations.
Apple tree
This tree has a hard, heavy material with a uniform structure. It is not easy to dry an apple tree, as it dries out a lot, but after drying it does not warp, does not crack. The tree behaves well in coloring, sanding, polishing, and burnishing. Almost ideal apple material for fine carving mini-sculpture.
Hazel
The material is simply excellent for small carving operations. Chess pieces have long been cut out of hazel, as well as pencils and handles.
Aspen
Soft, delicate shades of wood, lend themselves perfectly to cutting with a chisel. Lightweight toys, dishes, and various decors are made from it, which can be decorated with carvings.
Rowan
The reddish-brown base is not easy to process, it is strong and heavy. But for turning and carving operations, a dense and uniform composition is quite suitable. It was previously used for carving and slotting crafts. The rowan root is considered an excellent preparation for sculpture.
Alder
It is also used for carvings, as well as to imitate more noble wood species.
Separately, it is worth mentioning the birch. This is a wood of medium hardness and density, its structure is uniform. It is easily cut in different directions, perfectly drilled, and polished. But the material also has some drawbacks: birch has a high risk of cracking, warping, and shrinkage. It is prone to wormholes and rot.
And, of course, maple – a dense, bright, and high-strength wood serves as an optimal basis for carving operations. In particular, for laid-on threads.
Relief carving techniques for beginners

To achieve impressive results in beginner relief carving, you must follow the relief carving tutorial. Create a prominently embossed carving by following these steps:
Step 1: Prepare relief carving tools
1. Assemble all the carving tools needed for the entire project.
2. Make sure you sharpen your tools before starting your project.
3. Only sharp tools will give excellent results. Also, use a honing bar to align the corners of the chisel edge with the bevel chisel.
Step 2: Search and prepare wood carving
1. Finding a wooden carving board is not difficult. There are many options that you can choose from. You can select any wood.
2. Avoid using hardwood because it is difficult to carve. There are many softwoods to choose from. Linden – is the best for beginner relief carving.
3. However, you can also use jelutong, walnut, or white pine. However, you can buy a pre-made flat wooden panel for your wood relief carving.
4. Once you have the perfect carving wood, secure it to your workbench. Fix it tightly on the workbench to avoid movement when carving.
Step 3: Find a template to cut out
The pattern is very important in relief carving. You can draw your template, or you can download a free printable relief design from the Internet.
Whether you draw it or download it, you must copy it onto carbon paper before applying it to the wood panel.
Step 4: Transfer the pattern onto the wood
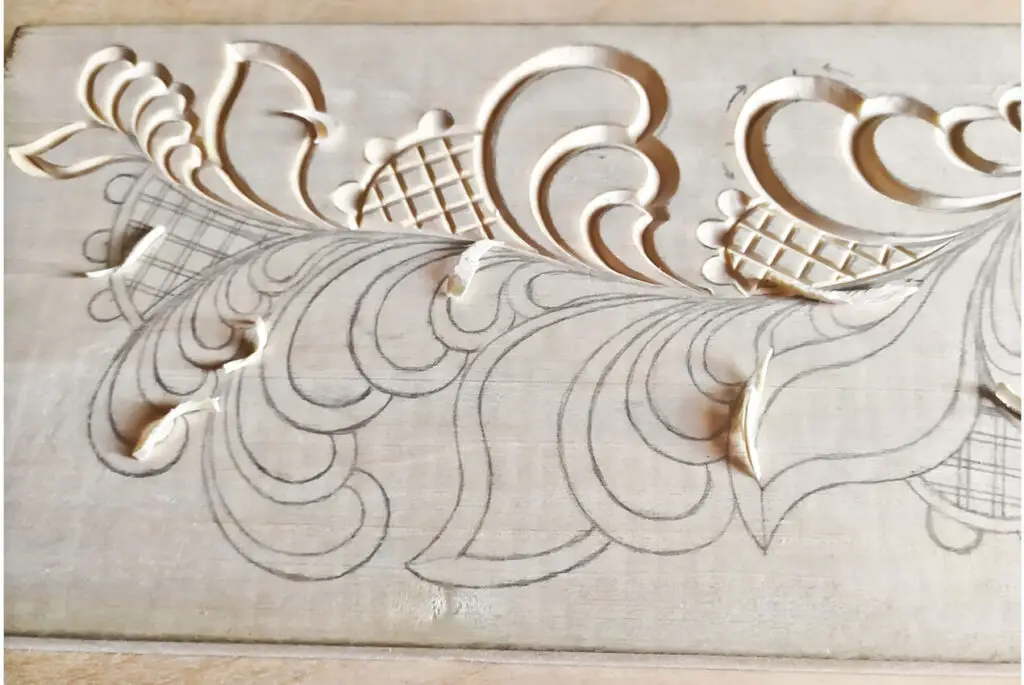
Before you start relief carving, transfer the design to the wood panel.
There are various approaches to this. But using carbon paper is the easiest and most common way to transfer a design to a wood panel, as it leaves clear marks on the wood board.
Step 5: Remove excess material around the wood panel
Make cuts around the design, following the guidelines on the wood. A hammer and chisel will come in handy when you are outlining the relief carving pattern.
Delete excess material around the drawing. Removing excess wood panels makes it easier to carve important details. In addition, it highlights the design.
Step 6: Add depth to the wood panel
Your wood carving relief will have different heights when you start relief carving. Be creative in determining the depth of the cuts in the wood panel. This is where chisels come in handy again.
To add depth, you should consider splitting the design into different sections. Divide according to the required height.
Now pick points on the desired parts of the relief to make it easier to cut. Instead, avoid cutting threads; use the V-tool to cut straight and downward.
Step 7: Carve in shadows and details
Now you have noticed that each shape requires a certain depth to be cut. Continue to redraw the carved relief to determine the important details.
Use the V-tool and notch to cut out important relief details. Do chip cutting because it helps you achieve ideal performance. Chip carving is the removal of small chips from the wood surface with a chisel.
Step 8: Smoothen wood carving
Relief carving smoothing is the leveling of the wooden background. There are various tools and methods to make carvings smooth.
Use the sander to smooth out the details, outlines, and background. It is recommended to use a grinder because it is ideal for curved parts.
Step 9: Finish your wood carving
Your relief carving is almost ready. All that remains is the final touch to make the wood panel more presentable. Start the final stage by cleaning the carved relief with a damp cloth.
Then apply the finishing ingredient and wood stain. Beeswax is the most common finishing ingredient.
There are also quality finishing ingredients such as tung oil and paints. However, be aware that some finishes will change the color of the wood.
After sanding, you should clean the entire wood surface with a damp cloth and check for any excess wood that you forgot to remove.
FAQs
What kind of wood is best for relief carving?
The best wood for relief carving is softwood, which is easy to process, such as walnut, pine, and linden. Softwoods are highly recommended for beginners, but professional carvers experiment with woods such as mahogany or maple.
How thick should wood be for relief carving?
It is recommended to work with a wooden board twice the thickness of the intended carving depth.
What are the 4 types of relief sculpture?
1. monumental – solves ideological and figurative problems identified in monumental works
2. garden – a design element of the garden space, conceptually one with the design of the entire garden;
3. sculpture for the home – a decorative component of the interior, made of wood
4. educational figures for children – play material, environmentally friendly, popular today
Conclusion
If a person is interested in relief carving, this indicates that he or she has a creative nature. Having mastered the skills of carving geometric patterns, they will not stop there. Wood is a plastic material that allows you to experiment. But, when developing sketches of future masterpieces, one must take into account that wood of different species is different.
Of course, linden, birch, or beech has a one-grain direction. However, these rocks differ in hardness. Beginners are advised to use linden and only then proceed to the processing of products from birch and other hardwoods.
In the process of work, it becomes clear that the same methods of work are not always appropriate. Each tree requires an individual approach.
This is the moment when the beginner begins to independently and creatively comprehend the process. The carver, when creating his compositions, understands that this process brings joy.

![How Long Does Wood Siding Last? [3 Lifespan Secrets] How Long Does Wood Siding Last: The Best Guide 2024](https://bestwoodforcarving.com/wp-content/uploads/2024/01/How-Long-Does-Wood-Siding-Last-3-Lifespan-Secrets-335x220.jpg)
![Examine [5+ tools and techniques] to cut square hole in wood Cut Square Hole In Wood: 5 Best Ways To Do It Perfectly](https://bestwoodforcarving.com/wp-content/uploads/2024/01/cut-square-335x220.jpg)
![Burn, laser, tool, CNC, hand wood engraving [5 ways explained] Hand Wood Engraving And Other Best Ways To Work With Wood 2024](https://bestwoodforcarving.com/wp-content/uploads/2024/04/bestwoodforcarving.com_-335x220.jpg)
![How long for wood filler to dry? [Tips & Tricks] wood 26](https://bestwoodforcarving.com/wp-content/uploads/2024/01/wood-26-335x220.jpg)

![How to remove white spots from wood furniture? [10 super-easy methods] How To Remove White Spots From Wood : Top 10 Best Tips](https://bestwoodforcarving.com/wp-content/uploads/2023/12/wood-12-335x220.jpg)
